

How To Service Your Brother Sewing Machine
Have yous ever saturday down at your sewing machine, only to find a stuck needle or jammed thread? The good news is that yous can acquire a few uncomplicated tricks of the merchandise to avoid almost bug. Check out a Blood brother sewing machine troubleshooting and repair guide to get started!
Brother sewing machine repair includes regularly cleaning and rethreading the machine. Checking fabric feed and tension settings tin can also improve sewing car function. Correcting bobbin, needle, and electrical issues tin can also repair the auto.
In this commodity, yous'll learn basic Brother sewing motorcar troubleshooting techniques. You lot'll find handy strategies for dealing with lesser-known bobbin bug. Finally, you'll find out all most the warranty and repair transmission for your Brother sewing auto!
How Do I Set My Brother Sewing Machine: 9 Common Issues
Blood brother sewing machines have a good reputation, only yous will even so discover yourself facing a tangled thread or broken needle once in a while! Check out this bones guide for troubleshooting the nine well-nigh mutual issues yous may encounter while using your Brother sewing automobile.
Thread Path
Tangled thread, skipped stitches, and several other major issues tin can oftentimes exist traced to the upper thread path.
Information technology doesn't matter if you have a fancy sewing machine or a bargain model. It doesn't even thing if you're an expert seamstress or a beginner sewer. Nine times out of ten, you tin can prepare any thread bug by removing the thread and rethreading the upper thread path!
How practice you rethread your machine?
- First, remove the current thread if necessary. Instead of taking the thread spool off the spool pivot and pulling the thread gratuitous, snip the thread virtually the spool so pull the thread downwards and out through the needle. The thread should not pull dorsum through the thread path, as the machine is non designed to work that way!
- Turn the handwheel until you lot can see the thread take-up lever peeking out from the arm of your sewing machine. Some Brother models have a threading line indicator on the handwheel, which needs to reach the superlative of the wheel to bear witness you lot that the accept-up lever is correctly positioned.
- Raise the presser foot. This may seem odd since information technology has no direct connection to the thread! This fundamental step releases the tension discs, though, allowing them to encompass the thread properly.
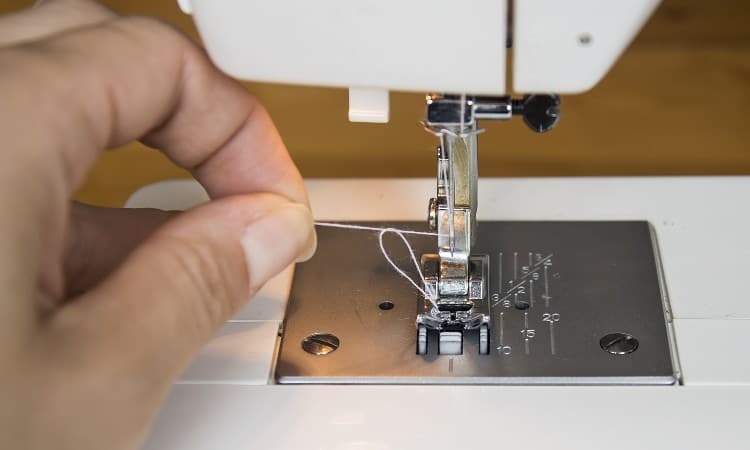
- Brother machines exercise a great task clearly marker the thread path. All you take to do is follow the colored indicators to wrap the loose stop of the spool thread through the tension discs and over the thread have-up lever.
- Brand sure yous slot the thread behind the terminal guide above the needle bar besides. And so employ your automatic needle threader or thread the needle yourself. Unless your manual says otherwise, most Brother models thread front-to-back.
- Sew a test series of zigzag stitches to brand sure this has fixed the thread consequence.
Tension
Sewing machine tension feels similar a big, disruptive result to many new sewers. The basic concept makes sense, but adjusting the settings may feel quite scary!
And so, how does sewing machine tension work? A tension disc mechanism (located in the arm to a higher place the needle bar) places more than or less pressure on the upper thread. More than force per unit area allows less thread to release into each run up. Less tension allows more thread, creating looser stitches.
You may need to adjust the tension settings on your machine when you apply silkier, thinner, or thicker types of textile. Someday you switch to a unlike type of needle or thread, yous should test a sample line of stitches to run into if you need to correct the tension settings.
And, of course, loose or skipped stitches every bit you work should besides give you a head'due south up that you need to play with the tension!
To accommodate the tension settings:
- First, rethread the upper thread path and reinsert the bobbin, but to make sure wrong threading did not cause the trouble.
- Next, find a sample flake of the same fabric y'all're using for your real projection. This makes sure you volition correctly set the settings for the specific material y'all want to sew on.
- Locate the tension punch or knob on the front end of your sewing machine. Typically, nearly Blood brother models place this toward the front of the sewing machine arm, in a higher place the needle bar.
- Run a few exam stitches and examine the results.
- If you can encounter loose bits of the lower thread poking through, you demand to prepare the dial to a lower number, loosening the tension.
- If the upper thread pokes through on the lesser side of the fabric, you need to prepare the tension to a college number.
- If you have trouble analyzing the test stitches, try setting the tension punch ane number lower and run some other line of test stitches. Do these stitches look more even?
- If that test also looks incorrect, set the tension dial 1 number higher than its original setting, and repeat the test.
- Proceed adjusting the tension punch and testing the stitches until you detect the perfect setting for your fabric.
Needle Replacement
Ideally, you should supplant the needle in your sewing machine at the start of every new projection or each time you switch to a different blazon of material. For case, ballpoint needles work best on knit and stretch fabrics. Sharp, narrow needles work best on silky fabrics.
Using a fresh needle helps foreclose whatever snagging on your fabric. Using the correct type of needle tin too mean the difference between runs and skipped stitches in your fabric or bang-up, even stitching.
If y'all detect a slight curve or skew to the needle, you need to modify it correct away! A bent needle may damage your car when it lands on the wrong spot. Information technology can as well easily snap off and fly at you while you sew!
To replace the needle:
- Plough off your car. It's always best to play it safe when you need to put your fingers next to the needle!
- Lower the presser pes lever. This gives you better admission to the needle.
- Pinch the needle betwixt your fingers to prevent it from falling down into the auto.
- Use a small screwdriver to loosen the needle clamp spiral, turning it toward you. Nigh Blood brother machines come with an appropriate screwdriver for this task.
- As the concur on the needle loosens, it will autumn away into your left hand. Set aside the one-time needle for safe disposal.
- Look at the new needle and note the apartment side of the shank. Insert the needle with the apartment side facing the back of the auto until information technology hits the needle stopper.
- Use the screwdriver to tighten the needle clamp screw again, this time turning the screwdriver abroad from you.
Make clean Lint Buildup
Keeping your machine clean and lint-gratis will prevent possible jamming or refusing to sew downward the road. Depending on how much you use your sewing machine, you lot may demand to clean it on a regular schedule, such every bit once a calendar week or equally frequently as every time yous begin a new project.
You should e'er refer to your sewing machine manual to learn exactly what y'all need to make clean. That said, you lot can also follow these basic steps to perform a simple cleaning.
On top of that, you should also read the fine impress on your warranty if you have a newer car. Sometimes Brother will void a warranty if you mess with the machine yourself instead of taking it into a certified repair store!
- Turn off and unplug your sewing car before yous begin. Accept this gamble to inspect the electric wires and make sure y'all practise not encounter any lint or grease build-up around the plug outlets.
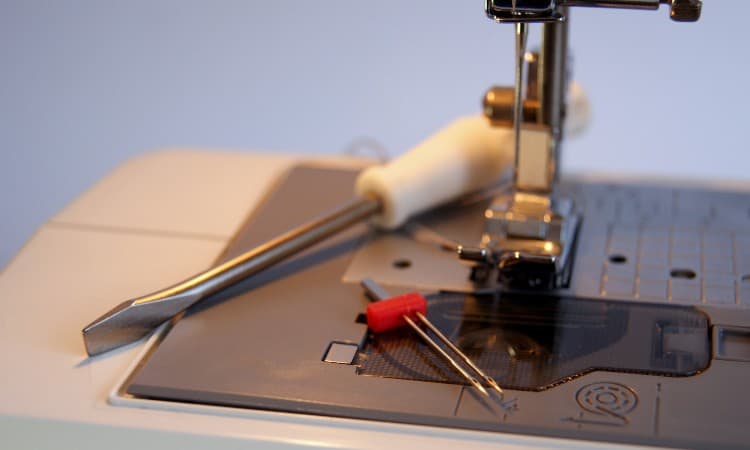
- Use a pocket-size screwdriver to remove the needle plate. Y'all will also want to remove the bobbin and bobbin casing.
- With a small, clean paintbrush, carefully sweep out any accumulated lint. Practise not use a vacuum for this process, as the suction could damage the alignment of movable parts! Also, don't utilise a pressurized air can or fifty-fifty accident on the auto to clear out dust and lint, as this could damage the machine, too.
- Replace the removable pieces.
- Grit the exterior of the car with a soft fabric.
- Set up a make clean spool of thread and run the thread through the upper thread path, pulling it down gently to the needle to remove any lint that may have defenseless in the thread path.
- Finally, run a few inches of exam stitches to make sure everything works!
Fabric Feed
Fabric feed issues can have several different causes.
- If the machine makes a weird dissonance and the fabric seems stuck, yous might have tangled thread beneath the cloth. This usually means you need to rethread the machine afterward removing the tangle with a small-scale pair of pair of scissors.
- If yous have a machine that features a drib feed, bank check the settings to make certain this is enabled.
- If you have a mechanical machine, make sure you lot have lowered the presser foot! If y'all forgot to put it back down afterwards threading, the cloth will not feed through properly.
- Feel the feed dogs with your finger. Do they still have raised, triangular teeth? If these take worn down, you may demand to supervene upon them.
- Stitch length can occasionally impact the fabric feed. If you're using a sew together length or pattern that does not adjust the material, such as a long, loose sew together on a silky fabric, the feed may seem off.
Skipped Stitches
Skipped stitches exit gaps of loose thread betwixt the regular stitches as y'all sew. This looks messy and leaves weak gaps in your seams! The good news is that yous can usually perform a few simple fixes to correct the issue.
- Are you sewing on knit or stretch material? If then, you may demand to bandy out your needle for a edgeless, ballpoint needle. Using stabilizer fabric or basting your work together before sewing can also aid prevent skipped stitches on knit fabric.
- Do you take a bent needle? A bent needle can also cause skipped stitches, but yous can hands check past removing the needle and laying information technology on a flat surface. If it lies horizontal to the apartment surface, you're expert to go!
- Gently pull on the upper thread to come across if information technology seems defenseless or if the tension may prevent the thread from smoothly moving to the needle. You may demand to arrange the tension on your machine to permit the thread to movement freely.
- If you lot have not cleaned your automobile in a long, long time, clogged lint may have built upward somewhere. Try giving everything a good cleaning!
- If none of these solutions ready the skipped stitches, your Brother machine may have a timing problem. This level of repair unremarkably requires professional intervention. Withal, if you lot don't listen taking autonomously the inner mechanisms of your car, you can effort looking upwardly a Youtube clip to assistance you adjust the timing.
Tangled Thread
Most of the time, rethreading your machine will fix tangled thread issues. When the upper thread slips out of the tension discs, it tends to tangle up below the fabric. Sometimes you may refer to this every bit jammed feed or as a bird'south nest tangle. This happens on every sewing machine, merely you lot can easily resolve the upshot by rethreading.
You tin can also try dusting under the needle plate and cleaning the thread path. Sometimes lint can mucilage up the works, causing the thread to get sticky and tangle.
Alternatively, you may demand to bank check the removable parts of your automobile. For example, if you have the wrong size of bobbin in place, it may rattle effectually and cause the thread to tangle. Supersede your needle in case it has dulled and is no longer catching the lower thread properly, too.
Broken Thread
If the upper thread repeatedly breaks equally you sew, something has gone wrong. You can try several different solutions to prevent this from happening once again.
- Cheque the spool size and spool pin you use to keep the thread spool in place. You may need to accommodate the sizes.
- You may also need to cheque that your car can handle the type of thread you choose. A very fine thread might not work with your Brother model.
- As ever, rethread the upper thread path. If a thread slipped complimentary of a guide or out of the tension discs, it may take hold of and tear on another moving part in the machine.
- Adjust the tension to a lower setting. Also much tension could exert enough pressure to snap the thread.
- A loose or bent needle might cause the thread to snap, especially if the aptitude needle strikes the needle plate equally you sew.
Electrical Issues
Offset things offset, unless you take a groundwork every bit an electrician, you may want to leave some electronic bug to the experts! That said, you tin can easily fix a few unproblematic problems by yourself.
For example, if the light on your auto goes out, you tin can easily order a replacement bulb and install it yourself. Make sure y'all utilise your manual as a reference.
If your machine doesn't plow on, cheque the wall outlet showtime! Perhaps the plug got loose. Also, make certain the connection to the machine is snug.
Besides, make sure the pes pedal cord has non come up loose as you stitch.
Beyond this, whatever internal writing issues probably demand professional person attention. If you have a computerized sewing machine, you should virtually certainly accept your car in for a repair if the screen goes dark or you lot need whatever kind of estimator repair.
How To Unjam a Brother Sewing Motorcar?
The near of import thing to know about a jam is that yous must stop sewing as soon equally you hear a strange racket or feel extra tension in the textile feed. Carrying on even for a few seconds tin can make the jam much worse!
To remove the jam:
- Turn off your sewing machine. You will need to work closely effectually the needle and to do this safely, you must turn off your motorcar.
- If the machine will let you, use the handwheel to raise the needle. Don't panic if yous can't turn the bicycle, and certainly don't attempt to strength it!
- Lift the presser foot to requite you access to the jammed fabric.
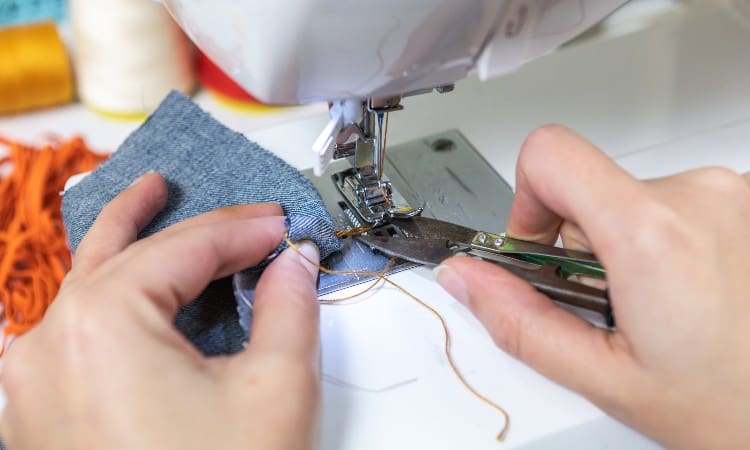
- If you lot have enough wiggle room, pry upwards the jammed fabric only a bit and apply a pair of embroidery pair of scissors to snip the threads property the fabric to the machine.
- Open the bobbin casing and remove the bobbin. Cutting free any threads yous may find tangled with this lower thread.
- Remove the needle plate and use tweezers to pick out any remaining thread bits.
- Use your lint cleaning brush around this whole expanse for practiced measure out.
- Finally, replace the bobbin and rethread the auto. Use a scrap of textile for a few inches of test stitches to make sure you have everything working correctly over again.
Brother Sewing Machine Bobbin Issues
Bobbin thread problems don't occur equally often equally upper thread issues, only you may come across one once in a while! When that happens, attempt these simple solutions to solve the problem.
- If your bobbin thread (the lower thread) keeps bunching up, yous demand to check your tension settings. Too-tight tension tin can cause this to happen.
- Short thread tails may get sucked back into the machine and cause tangles, also.
- Bobbin tangles may also occur if you use two different kinds of thread, one for the upper thread and a unlike kind for the bobbin. Brand sure you employ the same thread in both places!
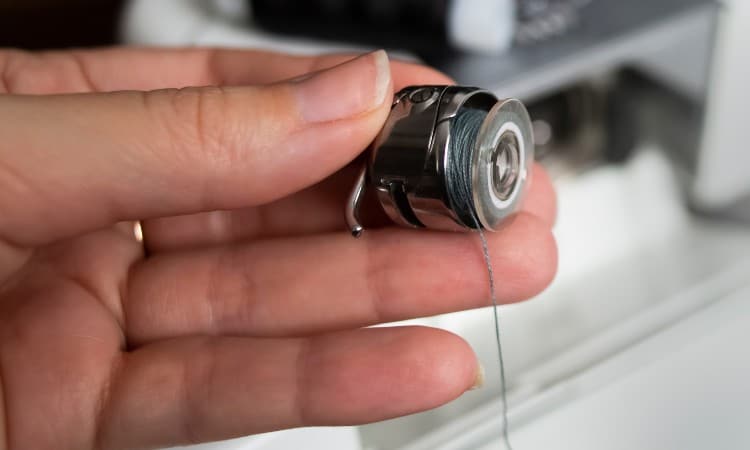
- If you have the wrong size of bobbin or have non inserted the bobbin in its instance properly, it could rattle effectually loosely and cause lots of tangles.
- More commonly, your bobbin may have gotten chipped or bent at some betoken. This will as well cause it to take hold of while spinning. A chip could even interruption the bobbin thread as it unwinds!
How Do I Fix My Brother Sewing Car That Won't Stitch?
Depending on the severity of the issue, you may observe a quick fix similar rethreading your machine, or you may need to take information technology into the shop if the motor is damaged.
Check the easiest solution outset: is your motorcar plugged in? Did you lot recollect to plough it on, and is the foot pedal plugged in deeply? Any of these simple issues will continue your machine from sewing!
Usually, a sewing machine that won't stitch is caused by a jam or incorrect threading. Later removing the jam, make sure yous follow the threading instructions in your transmission to rethread the auto. This essentially resets everything, giving you lot a fresh start!
You should also rewind the bobbin and read your manual to brand sure you lot accept inserted the bobbin correctly into the auto.
Look at your presser foot and make sure you have it downwards as y'all begin to run up.
If none of these unproblematic fixes helped, yous might have a problem with the motor or something mechanical inside the machine. This level of set up commonly needs a certified repair technician!
Blood brother Sewing Auto Repair Manual
Every Brother sewing machine comes with a special owner's transmission that will tell you how to complete basic maintenance and repairs. Fifty-fifty if you consider yourself an experienced sewer, y'all should read through this before using your auto for the first time!
What if you bought your machine 2nd-hand and it didn't come with the manual? No worries! Brother kindly provides digital access to all its recent manuals through the company website.
Now, if y'all have a vintage Brother model, you may accept to put on your detective hat to find the transmission! You lot can commonly purchase erstwhile manuals on eBay or Etsy. If y'all want a complimentary option, you tin achieve out to beau sewers on online forums and ask for assistance.
Brother Sewing Automobile Repair Nigh Me
Your average mom-and-pop repair shop may well have a certified Brother technician on staff because Blood brother sewing machines are so popular. That said, your best bet is to check the company website to locate an authorized dealer.
A technician trained specifically on Brother models has the all-time chance of fixing your motorcar chop-chop and effectively. For this reason, just Googling "sewing automobile repair virtually me" might not practise the play tricks! Attempt Brother's website first, and meet if yous take a certified repair shop nearby.
On top of that, if yous accept a warranty, y'all will have to follow Brother'southward rules and get to 1 of their people!
Do Brother Sewing Machines Have a Warranty?
Some Brother sewing machines practise accept a warranty. This depends on whether or not y'all bought your machine brand-new and when yous bought it. Brother currently offers a 3-yr warranty for parts and labor.
Machines used professionally may accept different warranty options. Embroidery machines, quilting machines, and sergers may too have some differences.
This warranty does come up with some conditions, though. Typically, you will void the warranty past making your ain unauthorized repairs instead of going to a professional. To find out if your machine qualifies and see what y'all have to do to keep that warranty intact, visit the company website.
Determination
Brother sewing machines jams or tangles frequently accept elementary solutions that you tin easily learn to save time and money. Learning how to rethread the car, replace the needle, and rewind the bobbin volition make your sewing much smoother! Using the right type of needle and thread will besides prevent many problems.
Any time yous run into a problem with your automobile, bank check your owner'due south transmission showtime to see if information technology offers a solution. You should also make sure you practice not attem[t any fixes that could void your warranty!
What Brother model do you have? What practise you like most about it, and have y'all ever tried to repair it? Leave a annotate below to allow us know!

How To Service Your Brother Sewing Machine,
Source: https://silverbobbin.com/brother-sewing-machine-repair/
Posted by: lawrenceutaltorge70.blogspot.com
0 Response to "How To Service Your Brother Sewing Machine"
Post a Comment